Want Quick Happy tips? Head over to Marc and Angels Hack

Practical Tips for Productive Living - Wonderful Quick and effective reading articles around the wellbeing, happiness and positiveness in bullet points numbers. I personally use it for easy reference

Want quick inspiration? Inspiration Peak is the place to go!

Check out and subscribe to Inspiration Peak in my Fav Websites for everyday quotes. Works a charm every single day. You're more than welcome to suggest a quote too!

Mind, Body, Green - Ultimate Wellness articles

I love their articles for it is written by various authors coming from wellbeing, yoga, holistic nutrition background that brings you closer to nature and serenity...

Lifehacker - Tips, tricks, and downloads for getting things done

Slightly drawn towards IT tips but they do also have tips about anything and everything you need under the sun, including tips for baking and cleaning! Check them out

Saturday, October 4, 2014

16 Reasons You’re Succeeding in Life (Even If You Don’t Feel You Are)

Just to remind that you are incredible as you already are :)

Thanks MarcandAngel

16 Reasons You're Succeeding in Life (Even If You Don't Feel You Are)

It’s often hard to tell just how close you are to success.
At times we all feel less than successful.  We feel like we’re running in place, struggling to make even the slightest bit of progress.  And while this is a perfectly normal feeling, you have to ultimately break free from it and see yourself and your life in a more positive light.
The key is to pay attention to the small things.  Just because you’re not where you want to be, doesn’t mean you’re a failure.  In fact, quite the opposite is true.  To be truly happy and successful today doesn’t mean you don’t desire more in the future, it means you are sincerely thankful for what you have already accomplished and patient for everything yet to come.
Every morning when you wake up, think of three things that are going well in your life at the moment.  As you fall asleep every night, fill your mind with an appreciation for all the small things that went well during the day.  Examine your daily successes.
Give the power of your thinking to the positive influences in your life, and they will grow stronger and more influential every day.  Remind yourself of what works well and why, and you’ll naturally find ways to make lots of other things work well too.  The most efficient way to enjoy more success in life is not to obsess yourself with what hasn’t worked, but instead to extend and expand upon the success you already know.
Here are some much-needed reminders – sixteen good reasons you’re already succeeding in life:
  1. You are walking your own path, not anyone else’s. – One of the most foundational sources of both success and happiness is simply being comfortable with who you really are.  Not trading your reality for a role or your truth for an act.  Not giving up your freedom of thought.  Not putting on a mask.  So never let anyone’s ignorance, hate, drama or negativity stop you.  If you desire to make a difference in the world, you must continue to be different from the world.  Don’t be scared to walk alone on your own path, and don’t be scared to like it.
  2. You are gradually working through your fears. – As you know, running from fear is a race you’ll never win.  In fact, what you’re afraid of dealing with is often precisely what will set you free.  So keep doing what you’ve been doing – take another step forward today.  Don’t let your fear decide your future.  Don’t let it shut you down.  Instead, let it wake you up!  Take chances and indulge in the excitement.  Tell yourself that the fear of suffering is far worse than the suffering itself.  Convince yourself that everything you want is on the other side of fear.  Because it is.  (ReadStart.)
  3. You have not let failure stop you. – Every success has a trail of failures behind it, and every failure is leading toward success.  Oftentimes our greatest insight comes from our failure, not from our accomplishments.  It’s a matter of taking each lesson and stepping forward with it.  At the end of the day, whether you choose to go with it, flow with it, resist it, change it, or hide from it, life goes on.  If what you did today didn’t turn out as you hoped, tomorrow is a new opportunity try again, or to do something totally different.  What’s important is to realize that you have a choice.
  4. You learn something new and grow stronger every day. – To find the best path forward we must occasionally stray from it.  There are no wrong turns; only paths we didn’t know we were meant to walk.  In the end, to be a success you don’t have to be perfect, you just have to remain perfectly capable of improving.  Keep letting your mistakes strengthen you.  Life is a series of little journeys.  Allow each step to be a teachable moment.  And don’t confuse your path with your destination.  Just because it’s stormy sometimes, doesn’t mean you aren’t headed for sunshine.
  5. You have overcome some considerable obstacles. – Nothing is ever as bad as it seems.  Nothing!  There is a benefit and a blessing hidden in the folds of every experience and every outcome.  Consider the possibility that the little obstacles in your life’s path are not obstacles at all, but stepping-stones to amazing places.
  6. You do your best to love what is. – A big part of success and happiness is not getting everything you want, but mindfully wanting what you get.  After all, stress is resistance to what is.  Continue to accept what comes to you totally and completely, so you can appreciate it, learn from it and then let it go.  Sometimes the best possible response is simply allowing yourself to be at peace with what is, rather than wishing for, and bemoaning, what is not.  It’s about doing the best you can with the hand you’ve been dealt.
  7. You try to be as present as possible. – We all have two lives.  And the second one starts now, when we realize that we only have one.  Really, nothing is worth more than today.  Because you can’t change yesterday or accurately predict tomorrow, but you can ruin today – your real life – by worrying about those two illusory eternities.  So stay present and focus on what you can create today.  Tomorrow will reveal itself exactly as it should, just as yesterday already has.  (Read The Power of Now.)
  8. You love yourself first, instead of loving the idea of everyone else loving you. – Putting yourself first does not mean being “selfish.”  It means being self-aware.  It means never forgetting to love yourself, too.
  9. You don’t judge people. – People are sometimes too quick to judge, but slow to correct themselves.  You know this and you graciously do the opposite.  It’s impressive, really.  Because it’s much easier to judge people than it is to understand them.  Understanding takes extra kindness and patience, and this “extra” is worth it.  This “extra” makes a big difference in the end.
  10. You are the reason some people smile. – Do not miss a chance – not one single, tiny opportunity – to tell someone how wonderful they are and how beautiful they are, inside and out.
  11. You have incredible people in your life. – Your capacity to be both effective and happy is directly related to the quality of people whom most closely surround you every single day.  Having just one or two of these people a phone call away is truly a priceless blessing.  These relationships are worth celebrating.
  12. You have been selfless in your closest relationships. – Almost every immoral action ever committed can be traced back to a selfish motive.  It is a trait we hate in other people but often justify in ourselves.  The fact that you have made sacrifices for people you love is remarkable in every way.  I know it’s not easy.  It’s one of the very hardest parts of loving someone – you have to give things up for them.  And sometimes, you even have to give them up, selflessly.
  13. You have given up doing things for others out of guilt. – Sometimes we give in to our loved one’s requests out of guilt.  But we need to stop feeling guilty for not giving the people we care about everything they want.  It’s sometimes a hard pill to swallow, but we foster the attitude of entitlement in our lives and relationships when we are ruled by a guilty conscience.  It’s OK to say “no” to friends and family sometimes.  You know this, so just keep doing what you know is right, and never let false guilt get the best of you.
  14. You aren’t overspending to impress or satisfy others. – I think it’s good for our friends and family to hear us say, “I can’t afford that” or “We will have to save for it.”  Because that’s real life.  We don’t have all the money in the world to buy everything we could ever want.  If you think about it, I bet you’ve known families before who are working multiple jobs to drive luxury cars and keep their kids in expensive extracurricular activities, when honestly, everyone would be happier and better off with more family and friendship time and less financial stress.
  15. You respect yourself enough to never let anyone walk all over you. – A simple reminder, but so very important:  Never, ever submit your self-worth or moral values to a relationship.  True love and friendship can flower only under the sun of mutual respect.  Some people may try to trample your garden and walk all over you, but you don’t have to sit there and take it.  Period.  (Angel and I discuss this in detail in the “Self-Love” chapter of 1,000 Little Things Happy, Successful People Do Differently.)
  16. You know you can’t please everyone, and you don’t try. – That’s right.  Keep standing strong.  Don’t let the negative opinions of others derail you.  Ultimately, there are two kinds of people – those who are a drain on your energy and creative force, and those who give you energy and support your growth.  Avoid the first kind.  May the bridges you burn light your way.  Just be happy, be honest and be true to yourself every day.  If others don’t like it, let them be.  Success in life isn’t about pleasing everyone.

Afterthoughts

If you can’t check-off every point from this list, no big deal.  This list is just a rough guideline.  We all need our own time to travel our own distance, our own way.  But keep in mind, the principle still applies:
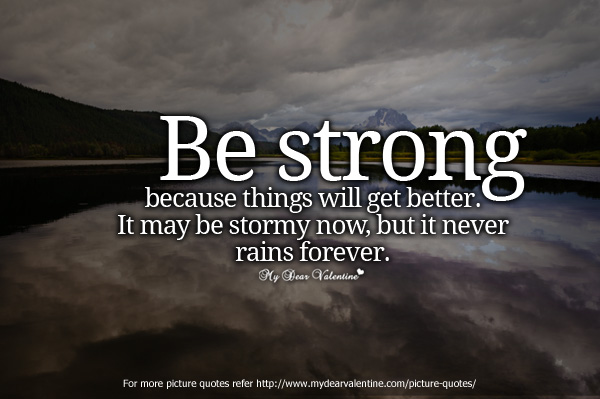
Success is not a skill; it’s a persistent attitude.  It’s not a place you arrive at; it’s a process you live through.  It’s what you do every day.  It’s what you are doing now…
You are succeeding in life.  You just have to believe it.
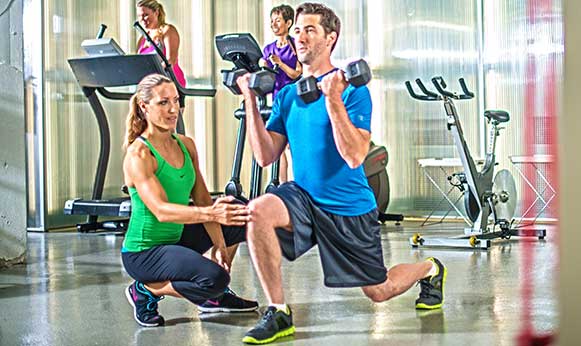
Wednesday, October 1, 2014

6 Lower-body Exercises to Do Instead of Squats

These are really useful to get the legs more adaptive to 3 dimensional movements.

Squats are usually in linear isometric so it tends to isolate more.

Give it a try during the recovery or boredom period!

Hip mobility and strength is essential for many daily activities like bending down to pick up an object or young child from the ground, walking up stairs or simply getting up from a seated position. In addition to providing an appealing shape, the glutes play an essential role in optimizing human performance for athletes, dancers and other people who move for a living. The primary role of the hip extensors, which include the hamstring and adductor muscles of the thigh, is to extend the hip during gait (walking or running) and provide dynamic stability when on a single leg. The hip extensors are responsible for lower-body strength and for distributing power from the ground through the rest of the body. It’s important to note that a lack of proper hip strength could lead to a sore low back, so doing exercises for your glutes will not only help improve the way you look, it can also help reduce your risk of back injury.
 
While the squat is an excellent exercise for enhancing both athletic performance and aesthetic appearance, when done incorrectly, it can cause discomfort in the low back and possibly injure the knee. If you are interested in strengthening your hips and developing an appealing backside, but want to reduce your risk of injury, try these six exercises that can help you achieve the results you want.
 
1. Glute Bridge
Glute bridge
 
Performed on either a floor or bench, glute bridges use the hip extensor muscles in a position that is safe for both the back and knees. To increase the level of difficulty, place a weight across the bony part of the hips (the ASIS of the pelvis). For best results, focus on pushing your heels into the floor and lifting your hips up to the ceiling while keeping your low back stable. D two to three sets for 12 to 15 reps (or until fatigue), resting for 45 seconds between sets.
 
2. Hip Hinge (also known as a Romanian Deadlift)
Hip hinge
 
This is a safe exercise that focuses on the glutes, hamstrings and adductors, making it great not only for your rear end but also your upper and inner thighs. During this movement, your lumbar spine (low back) should remain stable and stiff and the movement should come directly from your hips. When learning this exercise, place your hand on your low back as a reminder to NOT let it bend. Start by maintaining a stable spine and your knees slightly bent. Lean forward by pushing your rear end toward the wall behind you until you feel tightness in the back of your legs (do not let your back bend). Return to the starting position by pushing your feet into the floor and your hips forward. Learn to do this movement with your body weight first before adding resistance.
 
3. Step-ups
 
Step-ups
 
Walking or running up stairs or simply doing step-ups on a box is a great way to use all of the muscles responsible for extending and creating dynamic stability of the hips during upright movements. Use a box that is the same height or slightly lower than your knees. Place your right foot up on the step and push your foot into the box to step up. When you reach the top, lift your left knee into the air (this creates additional movement of the right hip, which is essential for using the entire muscle), lower the left leg and repeat all the reps on one side before switching legs. Do 10 to 12 reps on one leg before switching to the other leg; repeat for two to four sets. To increase intensity and build muscle more quickly, hold dumbbells in your hands.
 
4. Rear Lunges
 
Rear lunges
 
Squatting or lunging can be painful to the knee joint, particularly when the knee bends more than the hip or ankle during the movement. Stepping backwards removes the risk of too much forward motion from the knee by transferring most of the movement into the hip. Start with both feet hip-width apart. Step back with your right foot and slowly lower your right knee toward the ground while leaning forward slightly (maintain a stable spine during this forward lean). Return to standing by pressing your left foot into the ground and pulling yourself back to standing with your left leg. (For extra emphasis on the inner thigh muscles, think about sliding your left knee back.) Perform 10 to 12 reps on one leg before switching to the other leg; perform two to three sets with 30 to 45 seconds of rest between sets. To increase the level of difficulty, hold dumbbells in your hands or a medicine ball in front of your chest.
 
5. Lateral Lunges
 
Lateral lunges
 
The benefit of doing lateral or side lunges is that you not only use your hip extensors, you also involve the quadriceps muscles, which help to create shape for your outer thigh. Start with both feet parallel. Step directly to your right while keeping your left foot pressed into the ground. As your right foot hits the ground, push your right hip back toward the wall behind you while reaching for your right foot with your left hand. (This reaching motion increases the range of motion in your hip, placing extra emphasis on your glutes.) Return to standing by pushing your right foot into the ground and pulling with the inner thigh muscles of your left leg. Complete 10 to 12 reps on one leg before switching legs; perform two to four set with 30 to 45 seconds of rest between sets. To increase the intensity, hold one dumbbell (vertically) or a medicine ball in front of your chest.
 
6. Kettlebell Swing
 
Kettlebell swing
 
WARNING: This exercise may cause rapid development of your glutes, but is often done incorrectly. First, DO NOT attempt this exercise until you master the hip hinge. Once you can do two to four sets of 10 to 12 hip hinges without discomfort, you are ready to progress to the kettlebell swing. When done correctly this exercise is a dynamic version of the hip hinge (which is why mastering that movement is critical before learning this one). With your feet hip-width apart, start with the kettebell between your legs with your knees slightly bent. Lean forward by pushing your hips back (DO NOT ALLOW YOUR BACK OR KNEES TO BEND) to move the kettlebell slightly behind you. Explosively push your feet into the floor and your hips forward to move the kettlebell in front of the body. (Hold on to the weight with your hands, but avoid the urge to use your shoulders—the movement comes from the hips, not your upper body.) Allow the kettlebell to fall back between your legs while hinging forward to decelerate the movement. R for eight to 12 reps without letting your back bend or knees squat down.
 
If you want a lower body-focused workout to address your backside without having to do squats, select three of these exercises and, after a good warm-up, perform three to four sets of 10 to 12 reps for each exercise, resting approximately 30 to 45 seconds between sets. For best results do all reps on one leg before switching to the other leg. If you look closely, only one of these exercises requires the use of equipment, which means these are excellent options for when you can’t make it to the gym or simply prefer to work out at home. A great side benefit of focusing on your lower body is that you can quickly increase your lean muscle mass, which elevates your resting metabolism and increases the number of calories you burn outside of your workouts.
 
You can train your lower body almost everyday by doing strength training with weights one day and cardiovascular training the next. However if your goal is to develop optimal size and definition, you should allow at least 24 hours of rest after a good strength-training workout. For example, you can make a three-day split of lower-body exercises on day one, upper-body exercises on day two and cardio training on day three (make sure to take at least one complete rest day per week to allow for optimal recovery).

Friday, September 26, 2014

Strong Glutes Can Help Prevent Back Pain

In a certain way, there is also activating and strengthening the core too for that reason.

Enjoy!


By Justin Price

There are two things many of our clients have in common: They want to have nice-looking buns and, at some point in their lives, they will experience lower-back pain. The good news is that developing strong, shapely glutes can contribute to a pain-free lower back. In this article, you’ll learn why deconditioned and/or dysfunctional gluteal muscles and lower-back pain often go hand-in-hand. You’ll also learn which exercises build strong glutes and can help keep lower-back pain at bay.

What Causes Back Pain
Many people mistakenly believe that lower-back pain is caused by a problem with their lower back. This is understandable given that movements of daily life, sports and most weight-bearing exercise modalities require the spine to move forward, backward, side to side and in rotation (McGill, 2002). When you lean forward, for example, the spine rounds/flexes. When walking and running, it moves from side to side as you transfer weight from one foot to the other. When performing sporting movements like golf, tennis and baseball, the spine must rotate to achieve the desired motion (Chasan, 2002).

However, all these movements of the spine require other parts of the body to work as well. When bending forward to pick a weight up from the ground, for example, the ankles, knees and hips should also bend to help lower the torso. Similarly, as the spine moves from side to side during walking, the legs and hips should also move from side to side (i.e., adduct and abduct) to help provide a good base of support for the spine as it moves. Rotational movements of the spine should be accompanied by rotational movements in the legs and hips so the tremendous force created by swinging a tennis racket or golf club, for example, is dissipated throughout the entire body. When actions of the spine are not accompanied by correct movement in the rest of the body, the spine and its surrounding muscles (e.g., the lower back) have to take up the slack and may become overworked and injured.

How Strong Glutes Can Help Prevent Back Pain
The gluteal complex of muscles (i.e., gluteus maximus, medius and minimus) plays a key role in helping take stress off the spine during multiplanar movements. That’s because these muscles help control movements of the torso, pelvis, hips and legs. When you bend forward or squat, for example, your hips should bend backward to counterbalance the forward motion of your upper body to help you stay upright (Figure 1). The gluteus maximus works to decelerate flexion of your hips to help counteract the downward pull of gravity and prevent your lumbar spine from over-rounding forward (Price and Bratcher, 2010). If your glutes are not strong enough to fully engage when your hips bend backward, your spine must round forward excessively to lower your arms to the ground (Figure 2).


Similarly, much of the rotational movement stress experienced by the spine during sporting activities is moderated by the gluteus maximus muscle. When the spine rotates over the leg on one side of the body (e.g., when taking a backswing or follow through in golf, tennis or baseball), the hip and leg should also rotate to take stress off the lower back (Figure 3). Because the gluteus maximus muscle attaches to the structures of spine and pelvis and to the leg, rotation of the hip and leg should engage and lengthen this muscle, thus helping to decelerate rotation of the torso (Golding and Golding, 2003). If the gluteus maximus muscle is not working properly, stress from rotational movements is instead transferred to the lumbar spine and may manifest as pain in the lower back.
Side-to-side movement stress to the spine is moderated by the smaller muscles of the gluteal complex—the gluteus medius and minimus (Dimon and Qualter, 2008). As the spine moves from left to right as a person takes alternating steps when walking and running, the pelvis should also move from side to side (Figure 4). This shifting motion of the pelvis with the torso is decelerated by the gluteus medius and minimus because of their attachments from the pelvis to the side of the hip and leg. When they are healthy and functional they act as a brake for the lumbar spine, protecting it from excessive movement and stress. If they are not working correctly, pain may manifest in the hips and lower back.


How to Build Strong Glutes and a Pain-free Lower Back
As you have seen, correct functioning of the gluteal complex of muscles can help protect the structures of the lumbar spine as it moves during multiple planes of motion. However, before you begin overloading these muscles in an attempt to build strong glutes and a pain-free back, it is extremely important to adequately prepare them so as not to injure your lower back (Price and Bratcher, 2010). The following “warm up and wake up” series of self-myofascial release exercises and neuromuscular activation techniques will help ensure your gluteal muscles are working correctly and can protect your lower back as you move through various ranges of motion in the glute-strengthening program that follows.

Warm-up Exercises
For gluteal muscles to be flexible enough to lengthen effectively and decelerate movements of the pelvis, hips and spine, have your clients perform some self-myofascial release techniques on the muscles of the glutes and lower back prior to exercising. This will ensure the tissues are warm and mobile and can move in all three planes of motion.


Tennis Ball on the Butt
Massaging the gluteal complex of muscles before working out can help promote better movement of the pelvis, hips and legs, and ensure you get the most out of the strengthening exercises that follow.
Have your client to lie on his or her back with the knees bent. Place a tennis ball under the right side of the butt and scoot the body up and down and from side to side to move the ball to any sore spots, from the base of the spine all the way out to the side of the leg. You can progress this exercise by coaching your client to place the right ankle on the left knee. Place a rolled-up towel under the left hip to help keep the pelvis level. Roll out each buttock for one to two minutes. While a tennis ball is the easiest piece of equipment to purchase and use, a foam roller can also be used to massage the gluteal complex.


Tennis Ball on Lower Back
The gluteus maximus muscle ties into the fascia of the lower back (i.e., thoracolumbar fascia). Therefore, massaging the muscles on either side of the lumbar spine is important before performing glute-strengthening exercises.
Instruct your client to lie on his or her back with the knees bent. Place a tennis ball under the right side of the lower back (away from the spine itself) and scoot the body to move the ball to any sore spots between the bottom of the rib cage and the top of the hip. (Note: Do not place the tennis ball directly under the bottom two ribs. These are “floating ribs,” which do not attach to the sternum at the front of the rib cage.) Massage the area on each side of the spine for one to two minutes.


Foam Roller on Side of Thigh
The iliotibial band on the side of the thigh attaches the gluteus maximus muscle to the lower leg. Increasing blood supply to this structure will encourage correct movement of the hip and leg.
Instruct your client to place a foam roller beneath and perpendicular to the right leg, which is extended, and to balance the body on the right elbow and the left foot. Roll the leg up and down over the roller and pause on any sore spots. If your client has shoulder problems, or finds it difficult to balance, instruct him or her to lie on the ground with the head supported by a pillow, and place a tennis ball under the outside of the thigh. Perform this exercise for one to two minutes on each side.

Wake-up Exercises
People with lower-back problems typically have difficulty activating their glutes correctly. The following isometric and/or single-joint neuromuscular-activation exercises for the gluteus maximus, minimus and medius ensure these muscles are receiving correct input from the nervous system before you load them up with dynamic, multiplanar strengthening exercises.

The Duck Stand
The gluteus maximus muscle can lose neural input and become dysfunctional in people who have chronic lower-back pain. This isometric activation exercise helps “wake up” the gluteus maximus muscle by reestablishing a better connection with the nerves that supply it.
Instruct your client to stand with the feet hip-width apart and toes turned outward like a duck. Tuck the pelvis under (i.e., posteriorly rotate) and try to rotate the legs outward without moving the feet. As the legs rotate outward, the ankles roll out slightly, the arches of the feet rise up, and the glute muscles on either side contract. Stand erect with good posture and hold each repetition for 10 to 15 seconds. Perform three to four sets. Teach your client to pay attention to the sensation he or she feels on each side specifically and notice if both sides are working correctly. If one side is not working as well as the other, instruct the client to perform the “Glute Activation Over Ball” exercise that follows.


Glute Activation Over Ball
This neuromuscular activation exercise highlights and remedies deficiencies in one or both sides of the gluteus maximus muscle.
Instruct your client to lie prone over a gym ball using the hands to balance. Posteriorly rotate the pelvis (i.e., tuck under) and turn the right foot out slightly while lifting the right leg. Make sure to keep the hips level and square and the pelvis posteriorly rotated. It is also extremely important to not arch the lower back while lifting the leg. To help enhance activation of the gluteus maximus muscle, try different foot positions (i.e., turn the foot out more, keep it straight, turn it in slightly) while the leg is raised. Complete eight to 10 repetitions on each side, performing more sets on the side where the glute is most deficient. After completing this exercise, repeat the “Duck Stand” exercise shown above and ask your client if he or she now feels more activation of their gluteus maximus muscle.


Side-lying Leg Lift
The gluteus medius and minimus muscles need to be working effectively to help control side-to-side movements of the pelvis and provide a good base of support for the spine. Help your client “wake up” these muscles with this simple activation technique before performing the more dynamic glute exercises that follow.

Instruct your client to lie on his or her side with the head supported by pillow. Bend the knee of the right leg and place the instep of that foot just below the left knee. Gently raise and lower the right knee while keeping the pelvis tucked under and stationary throughout the exercise. Don’t “cheat” during this exercise by hiking the hip, arching the lower back or rolling the hips. When performing this exercise correctly, your client will feel a strong contraction on the outside of the right butt and hip. Complete eight to 10 repetitions on each side, focusing more on the side that is the weakest.

Gluteal-strengthening Exercises
Once the gluteal muscles are warm and awake, progress to the gluteal-strengthening exercises detailed below. These exercises are designed to strengthen the muscles in a lengthening fashion (i.e., eccentrically) to produce strong, healthy glutes that can protect the lower back from injury.

Reverse Step-lunge With Rotation
This exercise targets the gluteus maximus muscle. Lunging backward off a step requires the hip of the front leg to flex more and the gluteus maximus muscle of that leg to work harder to decelerate the movement. Rotating the torso over the front leg also promotes better activation of the gluteus maximus during this exercise.
Instruct your client to lunge backward off a small step while rotating the arms across the right leg. Keep the spine erect and shoulders level; push the big toe of the right foot into the step to help keep the right knee toward the midline of the body. Step back up onto the step and swing the arms across the left leg. Perform 10 to 15 repetitions on each side for two to three sets.

The “Ice Skater”
This exercise is designed to strengthen the gluteus maximus, medius and minimus muscles to provide a good base of support for the torso and prevent excessive side-to-side movement of the lumbar spine.
Instruct your client to place one foot on a small gym ball while balancing most of his or her weight on the right leg. Roll the gym ball out to the left side with the left foot while performing a single-leg squat with the right leg. Rotate the arms over the right leg while keeping the spine erect and shoulders level, and keep the knee of the right leg toward the midline of the body. If this is difficult, the client may need to regress back to doing more self-myofascial release exercises to help release tension from the glutes (see above). Perform two to three sets of 10 to 15 repetitions on each side.

Side Lunge With Reach
This exercise, while also strengthening the gluteus maximus muscle, focuses on strengthening the gluteus minimus and medius muscles.
Instruct your client to take a lunge stance with the left leg forward and reach the right arm away from the body while shifting the hips toward the left. The shoulders should tip down to the right as the hips move toward the left to counterbalance the torso. The left knee and ankle should rotate in the direction of the midline. Return to a standing upright position and repeat. Perform two to three sets of 10 to 15 repetitions on each side.

Thursday, September 25, 2014

Identifying the different types of fetal movement in pregnancy

Only the pregnant would know :). Mine has started blowing bubbles!

 Pregnancy

Courtesy of examiner.com

For new mothers especially, fetal movement is one of the most anticipated occurrences in pregnancy. Feeling your baby move around in your belly is one of the most amazing experiences you can ever ask for, yet sometimes these fetal movements can be difficult to interpret, being that there are a variety of different changes going on in the womb. These different movements are all perfectly normal for all mothers, and unless you are experiences pain or discomfort, there is really no reason to worry.
Here are a few examples and descriptions of the different feelings you will experience in the womb.

Flutters & Tapping - In as early as 16 weeks, your baby's constant movements might now become apparent to you. These early movements have been categorized as a "flutter" or "tapping," very similar to a muscle spasm or gas bubble you may have experiences before. Quite appropriately, these little flutters can often give you the butterflies. These feelings are also sometimes called quickening.

Kicking & Punching - As your baby gets stronger and slightly bigger, you may begin to feel some jabs and kicks. You can get a sense of how big your baby is when you feel a kick close to your belly button and feel its reverse reaction on the lower part of your pelvic bone. Although your belly is growing to accommodate your baby, he or she will start to be a little crammed sooner or later, and these kicks and punches can become more violent and sometimes even jolting enough to take your breath away or stop you in your tracks. They should never cause serious pain, but you might begin feeling a little discomfort closer to your due date. Regardless, it's all a reminder of how amazing pregnancy can be, and how much your little one grows each day.

Rolling & Sliding - You usually don't hear "is he rolling?" more than "is he kicking?" but it happens just as much. This feels much like an inside out Shiatsu massage chair in your belly. You may feel like your baby is a little squirmy snake or wiggly fish. This is a really fun part of fetal movement because you can actually see your baby moving inside your belly. And where your husband, other children, friends and other family members can't feel the baby like you do, they can see him move when he changes positions. It may become something you share as a couple and/or family before the baby's arrival. It's a way for everyone to bond with the baby and each other before birth.

Tickles & Popping - It might sound crazy, but it is quite possible that your baby is blowing bubbles in the womb. Although their lungs are full of fluid, they prepare their lungs for birth by expelling these fluids into the amniotic sac, which feels very similar to a bubbling tickle in the womb. Some mothers even report being able to see their baby blow bubbles during an ultrasound. Your baby may also have the ability to pop these bubbles, or even "cry", causing the same sensation.

Vibrations & Spasms - Sometimes scary and unexpected, but these feelings are completely normal. These can most likely be attributed to fetal hiccups. Fetal hiccups are unlike regular hiccups, but they have the same spontaneous reaction. It is normal to experience these occurrences multiple times a day, and even normal to never feel them at all. It all depends on the baby - every pregnancy is different. For mothers, fetal hiccups can feel like their belly is experiencing a rhythmic earthquake with shakes and shocking spastic movements. The baby can even be a little frustrated and disturbed by these hiccups, thus thrusting and stretching around inside, causing even more chaos in the womb.

Tuesday, September 23, 2014

7 Things to Know About Excess Post-exercise Oxygen Consumption (EPOC)

Yeap, EPOC only happens when the amount of oxygen coming into the body is lesser than of going out. Specifically drawn to higher intensity training. Here are a few tips!


 Sweating after running
What happens to your engine at the end of a long car trip? It doesn’t require a degree in automotive engineering to know that once you’ve reached your destination, your car’s engine stays warm as it gradually cools to a resting temperature.

Here's a cool fact: The same thing happens to your body after exercise. Similar to how a car’s engine remains warm after being turned off, once a workout is over and you’re back in your daily routine, your body’s metabolism can continue to burn more calories then when at complete rest. This physiological effect is called excess post-exercise oxygen consumption, or EPOC. Also known as oxygen debt, EPOC is the amount of oxygen required to restore your body to its normal, resting level of metabolic function (called homeostasis). It also explains how your body can continue to burn calories long after you’ve finished your workout.

Your metabolism is how your body converts the nutrients you consume in your diet to adenosine triphosphate (ATP), the fuel your body uses for muscular activity. ATP is produced either with oxygen using the aerobic pathways or without oxygen relying on the anaerobic pathways. When you first start to exercise, your body uses the anaerobic energy pathways and stored ATP to fuel that activity. A proper warm-up is important because it can take about five to eight minutes to be able to efficiently use aerobic metabolism to produce the ATP necessary to sustain physical activity. Once a steady-state of oxygen consumption is achieved, the aerobic energy pathways are able to provide most of the ATP needed for the workout. Exercise that places a greater demand on the anaerobic energy pathways during the workout can increase the need for oxygen after the workout, thereby enhancing the EPOC effect.

Here are seven things you should know about EPOC and how it can help you achieve optimal levels of calorie burning from your workouts:


1. During the immediate post-exercise recovery period, oxygen is used for the following functions:
  • Production of ATP to replace the ATP used during the workout
  • Resynthesis of muscle glycogen from lactate
  • Restore oxygen levels in venous blood, skeletal muscle blood and myoglobin
  • Work with protein for the repair of muscle tissue damaged tissue during the workout
  • Restore body temperature to resting levels
2. Exercise that consumes more oxygen burns more calories.
The body expends approximately 5 calories of energy (a calorie is the amount of energy required to heat 1 liter of water 1 degree centigrade) to consume 1 liter of oxygen. Therefore, increasing the amount of oxygen consumed both during and after a workout, can increase the amount of net calories burned.


3. Circuit training and heavy resistance training with short rest intervals require ATP from the anaerobic pathways, leading to a significant EPOC effect.
Strength training with compound, multijoint weightlifting exercises or doing a weightlifting circuit that alternates between upper- and lower-body movements places a greater demand on the involved muscles for ATP from the anaerobic pathways. Increased need for anaerobic ATP also creates a greater demand on the aerobic system to replenish that ATP during the rest intervals and the post-exercise recovery process. Heavy training loads or shorter recovery intervals increase the demand on the anaerobic energy pathways during exercise, which yields a greater EPOC effect during the post-exercise recovery period.


4. High-intensity interval training (HIIT) is the most effective way to stimulate the EPOC effect.
The body is most efficient at producing ATP through aerobic metabolism; however, at higher intensities when energy is needed immediately, the anaerobic pathways can provide the necessary ATP much more quickly. This is why we can only sustain high-intensity activity for a brief period of time—we simply run out of energy. HIIT works because during high-intensity exercise ATP is produced by the anaerobic pathways; once that ATP exhausted, it is necessary to allow ATP to be replenished. The rest interval or active-recovery period during an anaerobic workout allows aerobic metabolism to produce and replace ATP in the involved muscles. The oxygen deficit is the difference between the volume of O2 consumed during exercise and the amount that would be consumed if energy demands were met through only the aerobic energy pathway.


5. EPOC is influenced by the intensity, not the duration of exercise.
Higher intensities require ATP from anaerobic pathways. If the ATP required to exercise at a particular intensity was not obtained aerobically, it must come from the anaerobic pathways. During EPOC, the body uses oxygen to restore muscle glycogen and rebuild muscle proteins damaged during exercise. Even after a HIIT workout is over, the body will continue to use the aerobic energy pathway to replace the ATP consumed during the workout, thus enhancing the EPOC effect.


6. Research has shown that resistance training can provide a greater EPOC effect than running at a steady speed.
In an extensive review of the research literature on EPOC, Bersheim and Bahr (2003) concluded that “studies in which similar estimated energy cost or similar exercising VO2 have been used to equate continuous aerobic exercise and intermittent resistance exercise, have indicated that resistance exercise produces a greater EPOC response.” For example, one study found that when aerobic cycling (40 minutes at 80 percent Max HR), circuit weight training (4 sets/8 exercises/15 reps at 50 percent 1-RM) and heavy resistance exercise (3 sets/8 exercises at 80-90 percent 1-RM to exhaustion) were compared, heavy resistance exercise produced the biggest EPOC.


7. The EPOC effect from a HIIT or high-intensity strength-training workout can add 6 to 15 percent of the total energy cost of the exercise session.
High-intensity workouts require more energy from the anaerobic pathways and can generate a greater EPOC effect, leading to extended post-exercise energy expenditure. Heavy weight training and HIIT workouts appear to be superior to steady-state running or lower-intensity circuit training in creating EPOC (LaForgia, Withers and Gore, 2006).
Admittedly there is some debate about the significance of the EPOC effect for the average exercise participant because the high-intensity exercise required for EPOC can be extremely challenging. However, if you want results and are up for the challenge, increasing the intensity of your workouts by using heavier weights, shorter rest intervals or high-intensity cardio intervals may be worth the effort. While HIIT or heavy resistance training is effective and beneficial, remember to allow at least 48 hours of recovery time between high-intensity exercise sessions and try to limit yourself to no more than three strenuous workouts per week. If you do start increasing the intensity of your workouts to boost EPOC, consider adding these recovery strategies.

References

Bersheim, E. and Bahr, R. (2003). Effect of exercise intensity, duration and mode on post-exercise oxygen consumption. Sports Medicine, 33, 14, 1037-1060
LaForgia, J., Withers, R. and Gore, C. (2006). Effects of exercise intensity and duration on the excess post-exercise oxygen consumption. Journal of Sport Sciences, 24, 12, 1247-1264.

By Pete McCall, MS

McCall has an MS in Exercise Science and Health Promotion. In addition, he is an ACE-certified Personal Trainer (ACE-CPT) and holds additional certifications and advanced specializations through NSCA and NASM. McCall has been featured in the Washington Post, the New York Times, the Los Angeles Times, Runner’s World and Self.

Monday, September 22, 2014

Why Some Kids Try Harder and Some Kids Give Up

Praise wisely :). Thanks huffingtonpost!

My toddler struggled to buckle the straps on her high chair. "Almost," she muttered as she tried again and again. "Almost," I agreed, trying not to hover. When she got it, I exclaimed, "You did it! It was hard, but you kept trying, and you did it. I'm so proud of you."

Child in high chair

The way I praised her effort took a little effort on my part. If I hadn't known better, I might have just said, "Clever girl!" (Or even "Here, let me help you with that.") What's so bad about that? Read on.
Stanford researcher Carol Dweck has been studying motivation and perseverance since the 1960s. And she found that children fall into one of two categories:
  • Those with a fixed mindset, who believe their successes are a result of their innate talent or smarts
  • Those with a growth mindset, who believe their successes are a result of their hard work
Fixed mindset: 'If you have to work hard, you don't have ability.'
Kids with a fixed mindset believe that you are stuck with however much intelligence you're born with. They would agree with this statement: "If you have to work hard, you don't have ability. If you have ability, things come naturally to you." When they fail, these kids feel trapped. They start thinking they must not be as talented or smart as everyone's been telling them. They avoid challenges, fearful that they won't look smart.
Growth mindset: 'The more you challenge yourself, the smarter you become'
Kids with a growth mindset believe that intelligence can be cultivated: the more learning you do, the smarter you become. These kids understand that even geniuses must work hard. When they suffer a setback, they believe they can improve by putting in more time and effort. They value learning over looking smart. They persevere through difficult tasks.

What creates these beliefs in our kids? The type of praise we give them -- even starting at age 1.
The research

In one study, Dweck gathered up fifth graders, randomly divided them in two groups, and had them work on problems from an IQ test. She then praised the first group for their intelligence:
"Wow, that's a really good score. You must be smart at this."
She praised the second group for their effort:
"Wow, that's a really good score. You must have tried really hard."
She continued to test the kids, including presenting them with a choice between a harder or easier task.

Kids praised for their effort tended to take the challenging task, knowing they could learn more. They were more likely to continue feeling motivated to learn and to retain their confidence as problems got harder.

Kids praised for their intelligence requested the easier task, knowing there was a higher chance of success. They lost their confidence as problems got harder, and they were much more likely to inflate their test scores when recounting them.

Later, Dweck and her colleagues took the study out of the lab and into the home. Every four months for two years, Stanford and University of Chicago researchers visited fifty-three families and recorded them for ninety minutes as they went about their usual routines. The children were 14 months old at the start of the study.
Researchers then calculated how often parents used each type of praise: praising effort; praising character traits; and "other praise" that has a neutral effect, like "Good!" and "Wow!"
They waited five years.

Then the researchers surveyed the children, now 7 to 8 years old, on their attitudes toward challenges and learning. Children with a growth mindset tended to be more interested in challenges. Which kids had a growth mindset? Those who had heard more process praise as toddlers.

Can you unfix a fixed mindset?
I got an email from an inner-city high school teacher. "Is it too late to learn algebra, or third-person singular conjugation, or rocket science if you didn't [develop a growth mindset] when you were 4 years old?" she asked.

Dweck had the same question. So she took middle-schoolers and college students who had fixed mindsets. She found that the students were able to improve their grades when they were taught that the brain is like a muscle: intelligence is not fixed.

It's not too late -- not for your kids, and not for you. Salman Khan of Khan Academy is on a mission to let you know it. He created an inspiring video, based on Dweck's work, titled "You Can Learn Anything":


The message: The brain is like a muscle. The more you use it, the stronger it gets. The way you exercise your brain is by embracing challenges, practicing skills, learning new things. As Khan puts it, "the brain grows most by getting questions wrong, not right."
Which is why, when my toddler was trying to snap her own buckle, I needed to encourage her to take on the challenge by saying, "Almost!" and "Try again" instead of "Here, let me do that for you."

Pass it on
Sharing is caring, as they say. "If society as a whole begins to embrace the struggle of learning, there is no end to what that could mean for global human potential," Khan writes.

So pass it on!

Sunday, September 21, 2014

7 Must-Know Details About Your Pregnant Body

Reality check...

Courtesy of Healthylivingmsn. Thanks!

Your belly is going to grow larger, and perhaps your feet will too. This much you already know about pregnancy. But what else happens to your body? And is there anything you can do to manage it?
Having a baby will be, by far, the best thing that ever happened to you. But the rearranging of various body parts that comes along with this miracle can catch you by surprise. It helps to know what’s going on so you can maintain at least some semblance of control. Here’s an insider’s guide to seven common body changes.
1.A mucus plug is not a stuffy nose.
Drinking wine is discouraged during pregnancy-and yet, in an ironic twist, when pregnant we are, essentially, corked. Let me explain. Pregnant women have a mucus plug, a snot-like glob clustered around your cervix that seals the cervical opening and protects the developing baby from bacteria and infection. My doctor had not mentioned to me that the mucus plug was there and could potentially “fall out” as my body prepared to birth. Fortunately, I’d read about it in a pregnancy book. My plug came out a few days before labor during a bathroom break at work and looked like a thin spread of mucus on my panties. Another friend lost her plug in a similar way a few weeks before she delivered. It usually happens when your cervix begins dilating, but not every woman loses it—or notices it—before she gives birth.
2.Support your legs so your veins don’t pop.
I once ran into a friend at the community swimming pool who was pregnant with her second child. Her first pregnancy had left her legs smooth and unmarred. Her second pregnancy produced different results. “Veins are popping out all over the place,” she said, in a hushed, private tone that implied the legs of which she spoke belonged to someone else: Surely hers would return at some point. Your blood circulation increases when you’re pregnant, and this can create more stress on your veins. Your growing uterus puts pressure on the veins leading to your legs. You are also producing more progesterone, which relaxes your blood vessels. The chance of getting varicose veins increases with each pregnancy, and tends to be hereditary. If you care, make sure you wear support hose as much as possible during your pregnancy. Don’t stand for long periods of time, and support circulation by elevating your legs when sitting for long stretches. Exercise helps, too, as does staying within the recommended weight range for your pregnancy stage.
3.Say good-bye to your vagina as-is.
It’s sad to bid farewell to an old friend. Those of us who grew up after the book Our Bodies, Ourselves was published may have spent some time with a mirror getting to know our private anatomy. You may even love yourself down there. If this is true, be prepared to fully let go of what once was. After a vaginal delivery, your genital area will never again look the same. It’s not that it looks bad, it’s just that it looks different—especially if your skin tore during birth, or if you had an episiotomy. The space inside of your vagina will always be a little larger, your vaginal lips stretched open, especially right after birth. Over time, you regain muscle tone, and kegel exercises help, still it’s never the same. Had I thought this through, I would have planned a grieving ritual, or at least taken a Polaroid of my pre-birth anatomy, to place on a private photo shrine along with pictures of loved ones no longer with me. Even after you’ve moved on, you can fondly remember the way things were.
4.Body fat creeps everywhere, then goes away
You may naturally have little dimples of fat on your bottom, or your tummy, or the underside of your arms. It’s part of you, and not a problem: In fact, it adds to your womanly beauty. Well, when you’re pregnant, these fat dimples creep out from their normal resting spots, the ones you’ve come to accept as uniquely you. They push forth to claim areas you’re not yet willing to relinquish. The backs of your legs. The fronts of your legs. Your calves, your upper arms. Have they no mercy? Pregnant fat creep happens to even the fittest among us, in large part due to pregnancy hormones. This past summer, I saw a formerly svelte and toned yogini at the neighborhood swimming pool, still fit yet enveloped in a thin layer of just such pregnancy fat. The good news is that, miraculously, about seven months to a year after you’ve given birth, if you’ve been eating reasonably and exercising moderately, the fat creep goes away. Just because it ventured forth once, you’re not stuck with it for the rest of your life.
5.Baby leaves tummy, tummy sticks around.
I birthed my daughter on a Wednesday, and invited my team of employees over to my home to meet her the next day on Thursday. Thinking I looked pretty good, just one day after birth, I pranced around in my workout pants as I showed her off. Later, one of my single co-workers said to me, “You are the first person I’ve seen who’d just given birth, and I didn’t realize women still looked pregnant, even after the baby is out.” My shoulders drooped when I heard this, but I realized it was true. I still had my belly. Long before I had my own baby, a friend had once described for me her tummy after birth, and I was shocked. “The baby is out, but you still have this soft mound of belly that’s rolling around and you don’t know what to do with it,” she’d said. Compared to when the baby was inside you, your tummy does look smaller, but even if you normally have a flat stomach, be prepared to have a pregnant-looking belly for at least a month or so after your child is born. Your tummy is like a balloon that has been inflated and needs time to deflate. Post-birth hormones kick in to help this happen, but it takes time. Your uterus takes about four weeks to contract to normal size. Cells that swelled during your pregnancy release their fluid, and gradually your belly shrinks back down.
6. Support your breast area; it’s much bigger than you think.
If you thought your breasts were small, they’re not. If you already have large breasts, then prepare to bring in the industrial harnesses. Most of us have no idea of the actual area of our breasts until they fill with milk. The milk-filled ducts swell over into our armpits. They creep up toward our chins. Your self-breast exams to screen for cancer will never be the same, now that you fully realize how large your breast area is. Your milk-engorged breasts could stand on their own—but don’t let them, unless you don’t mind sagging once the milk is gone. I spent one day walking around my house, fully immersed in the beauty of my bare milk-filled breasts, once a B-cup and now miraculously a triple D, until a close friend, also a mother, informed me that it is the stretching of the Cooper’s ligaments, not the filling of the milk, that makes breasts sag. When these ligaments lose their strength and tension, breasts lose their structural integrity. A proponent of integrity in all areas, I immediately popped my newly large breasts back into their cases—a sturdy nursing bra by day, and a more relaxed nursing bra for night—and am happy to report the ligaments were saved.  
7. Birth hurts, but post-birth sleep deprivation hurts more.
I’d heard the details of birth that you aren’t supposed to hear before having your own. When my sister birthed her first child, I asked how it had gone and she reported, wide-eyed from her hospital bed, after back pain and a large-headed infant, “It was bone against bone.” Hey. Wasn’t she supposed to protect not-yet mothers from this information? Another friend had described the ring of fire—the moment the baby’s head crowns and starts to push through the cervix. Sure enough, that’s exactly what it felt like, a burning circle of stretched-out skin. Expecting this ahead of time allowed me to actually savor the experience, pain and all. I was unprepared, however, for a more difficult part of having a baby: sleep deprivation. Not the kind that happens right after birth, when you feel so euphoric you don’t care whether you’re getting enough. No, the impact of sleep deprivation that compounds over time. You hit a no-sleep wall at about six weeks. The novelty wears off and you desperately require your ZZZs. For some, if your child is not a sleeper, this need stretches on and on. One, two, sometimes up to three years. Take it seriously right after birth, and do what you need to do to teach your baby healthy sleep habits so you can sleep too. It’s natural to want to tend to every cry, but over time you’ll be a better parent if you are present and well-rested.
Jean Weiss had a baby six years ago and despite all the changes, she still loves her body.
Daniel McNeive, MD, is board certified in obstetrics/gynecology and in private practice at St. John’s Mercy Medical Center in St. Louis, Missouri.